Acrylic painting techniques are many and are directly related to its features, therefore having some previous knowledge of these acrylic painting techniques before you begin is beneficial.
Do you want to come up with some emerging acrylic painting ideas? You might wish to attempt some stunning acrylic painting techniques to give your work a fresh look. There are so many various acrylic paint techniques to choose from, and they all provide endless opportunities for artistic expression!
You’ve come to the perfect place if you want to try something new for your next paint party or spice up your canvas paintings. These fundamental procedures are really easy, and many of them may be completed using common household items. You’ll undoubtedly find some ideas and inspiration for different things to try in your creative art journals here.
Dripping
This is an easy concept to execute by simply taking your preferred color of paint, mixing it with a little water, and applying it with silver brushes to the paper. Simply tilt the paper so that the paint begins to run. You can apply extra water if the paint isn’t flowing freely when you tilt the paper.
This method was performed over some ink calligraphy in the image above. The watered-down paint dripped and smeared with the ink layer underneath it, creating some interesting smearing effects.
Pouring
This amazing method is simple to use and allows you to produce some amazing abstract art. Choose the colors you wish to use and combine them with a pouring media individually. Depending on your color selections and pouring method, you may also pour paint from varying heights to create kaleidoscopic backdrops or give an eye-catching finish to your abstract painting. Swirls, waves, splashes, marble-like finishes, and bubbly textures occur from creating puddles and pools of color.
Splattering
Color, expressiveness, and embracing life’s disarray are all important aspects of this style. Acrylic paint may be splattered and sprayed for a variety of effects. I’ve tried diluting down acrylic paint and putting it in a spray bottle to make my own DIY acrylic spray paints in the past. You can try wetting your brush in water, then dip it into an acrylic color of your choice before flicking/splattering it onto the canvas. The most crucial step is to dilute the paint to the point where it won’t clog the spray bottle nozzle.
Underpainting technique
Underpainting is a method in which you paint the first coat in one color and go over it with a different color after it has dried. It’s excellent for establishing tonal values and intensity. Underpainting can be utilized to create tonal dominance in a painting by unifying it.
When the first coat of paint dries, it will not blend in with the new layer, but will instead show through to the second layer somewhat.
Layering
Underpaintings, which are drawings of the artwork you’re about to paint, are frequently created by professional painters using thin layers of paint. Because acrylic paint dries rapidly, adding thin layers on top of dried background layers to add additional detail to any region of a painting is simple. These layers also give your finished painting greater depth and color, such as darker shadows or more dramatic highlights. Try warm underpainting using burnt sienna (brown) acrylic paint or cool underpainting.
Detailing
Detailing is done using a thin brush that has been moderately wetted to keep its sharp shape. After that, the brush is used in the same way as a pen or pencil.
You can’t go wrong with a fine, damp brush if you want to add little, exact details to your point. A dry brush’s bristles tend to spread out and make wider lines, but a wet brush’s bristles stick together and create a sharp point.
Dry brushing
This method is perfect if you want a deeply pigmented stroke of color with rough, scratchy unpolished edges. This light, a dry-brushed layer is great for painting plants, soil, sand, pebbles, and other natural items, as well as rough-textured objects like denim, TV static, and more – anything that needs a little grit. This is self-explanatory and simply use a dry brush to add paint to your canvas.
Mix colors
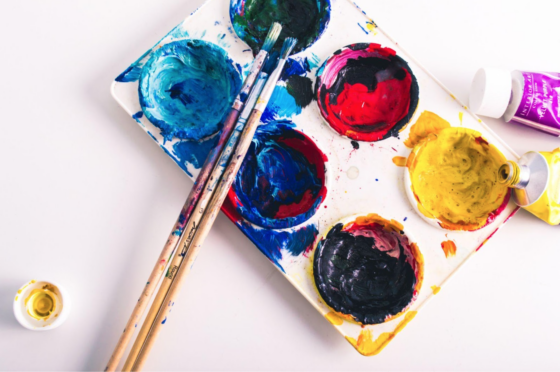
Red, yellow, and blue primary colors, as well as white and black, may be combined to create practically any other color. However, with only these five colors, you may generate hundreds of colors that aren’t available in stores, allowing you to create a really unique picture.
You don’t want to forget about your discoveries when you mix up your paints and try out new combinations. Make your own color mixing chart to help you remember the many colors you created and duplicate them more quickly next time.
Draw a chart with 1 x 1-inch squares using a pencil or pen and a sheet of paper. Along the top and left sides, write the names of your colors, and then mix the two colors together in each square.
Lift paint sections
Why would you want to do something like that? To peel the still-wet paint from the canvas, try using a wet or dry paper towel, cloth, or sponge. This method will take some time to master, but it’s a terrific way for new painters to relax up and enjoy the process. Because you can simply create soft backdrops, cloud and water effects, the appearance of fabric folds, textured patches, and more using this acrylic painting method.
Smudging
The most important thing is to choose colors that will combine effectively. Another acrylic painting method option is to smear the paint after it has been applied with baby wipes or paper towels. Experiment with different materials – wetter baby wipes will provide a different texture than dry paper towels. You may also use it to create different effects by patting it or smearing it.
Conclusion
Acrylic paint is simple to work with since it does not need a great deal of technical understanding. It’s adaptable, so you may add water and mix it up to obtain the desired result.
